Viewing entries in
House Cleaning

3 Comments

Household Cleaning Hacks

Do I need to make great efforts to keep your home clean and neat? No one likes The uncluttered house, but some Of us hate house cleaning more.

Here are seven great tips to help keep your home clean without bothering.

Clear Of Excess

Chaos accumulates quickly if You have a slight increase. If there is not enough space in your house, The mess begins to appear everywhere and makes The house dirty. Instead Of storing things for "just in case" situations, get rid of everything which You no great use. You may even donate to gifts so as not to be in vain. This can make your home clean, without any special effort, You will be fine too.

There is a place dedicated to everything.

A clean kitchen

After getting rid of The mess, it is essential to give all that remains in The room and where You belong. For example, hooks in The lobby can be used for your coats, bags, shelves in living room tables and drawers ideal for books, magazines, and TV remote controls. This avoids a mess on The carpet, so when it comes to house cleaning, it's easy to do.

Develop a strategy for Your Children.

If You have children, you'll know they might be thinking a bit about The cleanliness Of where they live. If your child likes drawing, make sure You have extra drawing boards and do not Use walls to show your skills.

If your kids are too big to help, You can Use baskets with stickers to know where everything is arranged. Because children enjoy, they can color carpets by dropping products, so You can use The services Of professional carpet organizers to clean carpets in your living space.

Do work on The go

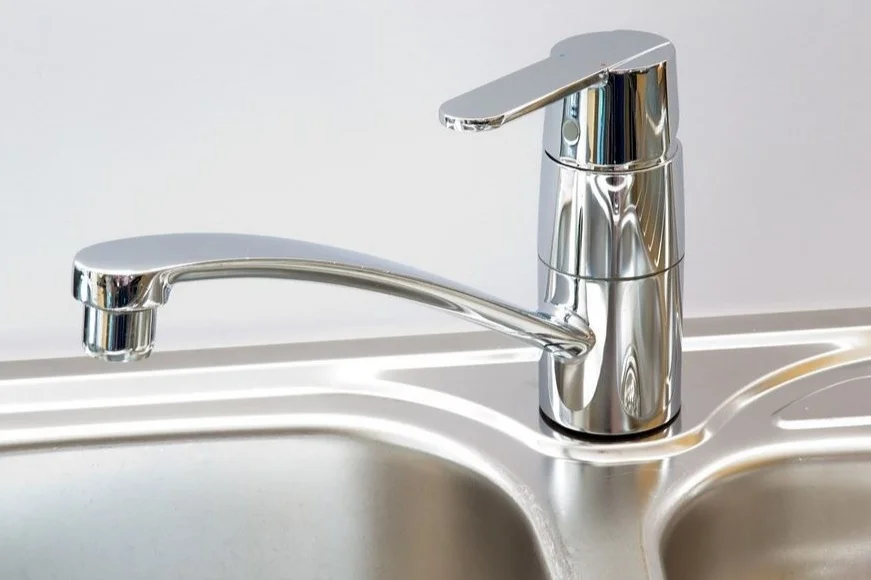
To go to The bathroom for a shower, make sure to check out certain places quickly. For example, if The tub is dirty, You can clean it immediately before bathing. This hotfix can help improve The performance Of your entire home, yet You still have 10 minutes to complete The task.

Capture everything at dusk

Select for each member of The family (including you!) The general rule that tries every night at a particular time to collect all things for at least 15 minutes and put them in place. The complete process rarely needs any effort, and also your home shall become more realistic than before.

Reduce Paper usage

Consider removing Paper in your daily life. Magazines, receipts, magazines, and newspapers are rapidly accumulating at home, lumping up all The space. Change your bank accounts to sheets, and get a shelf to keep magazines and newspapers in order.

Make a bed every day

Although they may look dull, they are not. Cleaning The bed takes less than 5 minutes and is one of The easiest ways to make your bedroom cleaner and tidy. It also sets a tone for The rest of The day and most likely will go in an elegant tone. These household cleaning hacks will always ensure that your house is very clean than ever.

3 Comments

2 Comments

Fast House Cleaning Tips

Who does not want their house to look clean and beautiful? However, house cleaning is a challenge for many of us. You can hire a professional house cleaning service if you do not want to do the work yourself. Learn how to clean your house faster so that you can save time.

Here are some tips to help you keep your home clean. These tips are simple and straightforward so that you can try them effortlessly. Take a look.

Clean the mirror

You do not need to purchase paper towels and wipers to clean mirrors in your home. Some vinegar and newspapers all you need to make mirrors shine like new. Remember that your home may look cleaner if the mirrors are clean and shiny.

Rinse plates

A clean kitchen

Cleaning plates may be a daunting task if they remain unclean for a while. Get used to rinsing a dish after lunch or dinner and ask all members of your family to do so, making cleaning the boards easy. These are usually small and simple, but quickly eliminate a lot of trouble. No one likes trying to scan the paintings from the paintings of the arts, right?

Clean the oven

Do you often use the oven for different purposes? Sometimes, if you do not use the oven, give it a quick spray of the cleaning solution and keep it until the next day. Before turning it on the next day, wipe the oven quickly. This will make bread much more comfortable than ever before.

Clean the microwave

Microwave cleaning is effortless. Take a glass of water and place it in the microwave at high temperature for a few minutes. The water in the cup will turn into steam and loosen the fast food so that you can erase it. It's effortless.

Clean the refrigerator

Most of us consider cleaning a refrigerator a considerable task and often avoids cleaning it. Follow these steps, and it will be a little easier. First of all, you should get rid of any spoiled or expired food from the refrigerator, then start wiping from the top and stop working. Soda water and bread create an excellent detergent and will not leave the smell of the fridge like strong detergent.

Clean the bathroom

Use lemon oil to add gloss to the bathroom tile. The growth of mold and mold also inhibits lemon oil.

Cleanliness of the toilet

Most of us do not like cleaning toilets, but this is very important because it relates to cleanliness. Buy an excellent cleaning solution and use it twice a day to keep the bathroom clean and shiny.

In the modern world, more and more people are trying to get rid of black housekeeping jobs, contracting honest cleaning at a reasonable price. Homeowners in hotels or restaurants are in desperate need of such cleaning qualified to follow personal hygiene rules to stay at work. Follow our tips on how to choose an excellent cleaning service and get rid of this blackwork.

Final Thoughts:

No doubt, these tips will help you keep your home clean. However, to completely clean your home, you should hire a professional cleaner that gives your home a new look.

2 Comments

1 Comment

How To Clean A Vacuum Cleaner

Vacuum cleaners have taken a huge burden off our shoulders. I am talking about the difficulty of cleaning. Cleaning floors, carpets, windowsills, furniture, upholstery, and walls become more comfortable with the help of this house cleaning machine.

Its performance level also depends on its cleanliness. If you do not regularly clean it, it will lose its reliable suction system. Cleaning your vacuum cleaner should also be done correctly.

Don't sweat it. Here are a few tips you may find useful:

  1. Remove the dirt compartment of the machine when it has already been filled up to 3/4 of its capacity. Don't wait for the bag to be filled up with dirt. The device cannot suck dirt if the container is already full. Discard the contents of the dirt compartment. If you are using a bagless cleaner, throw away the disposable bag.

  2. Clean the pre-motor and the post-motor filter of the machine. Remove them from the device and rinse them. Use your dishwashing liquid to get rid of the gunk that has collected on the screens. You can likewise use a soft-bristled brush to pry the debris away from the screens. After removing the waste, you can rinse them in clean water. Let them drain completely before placing them back to the vacuum machine.

  3. Clean the attachments. After using them, remove them from the main machine. Prepare a bucket full of water. Add one cup of Lysol cleaner. Soak the accessories in the cleaning a house solution for about 15 minutes. This will disinfect the attachments and get rid of any foul smell.

  4. If you are using an upright vacuum machine, remove the brush roll. Carefully get rid of collected hair or pet dander. Also, get rid of fibers if there are any. If it is starting to smell, try rinsing it in soapy water. Get rid of the gunk and dirt residues. Let the brush roll dry entirely before placing it back to your machine.

  5. Use an appliance polisher to clean the external parts of the machine. Place a bit of the appliance polisher on a clean rag. Wipe it on the outer part of the device. Get rid of oil, grease, or dirt.

  6. Sometimes you may want to clean your car by carrying a vacuum cleaner outside if so, make sure you bring a rug or anything else to install a vacuum cleaner.

You should replace and rinse filters, but before returning them, you should ensure they are adequately drained. If you can, you should place it near the radiator as much as possible, without touching it for at least half a day.

Undoubtedly, the hair strands will remain in the heart of the brush, and you will need to carefully remove them, cut hair, and pull it smoothly.

This might seem a few strange, but the best way to clean a dirty nozzle is to use another dump tool. All you ought to do is separate the top of the brush, then the slitting tool that needs to settle in place, and as you move along the bristles of the brush, you will begin to absorb the dirt.

If you have a vacuuming cleaner with a bag or vacuum cleaner without a bag, both types should be cleaned properly. The best thing you can do is take the bags or cans without a pouch in the basket and empty it. Just make sure you do not breathe dust.

The great thing is that in the latest models, there are keys that allow you to pour the collected garbage into the box quickly.

For vacuum cleaners without bags: Be sure to place the container near the container as much as possible, and then start slowly tilt the bottle and empty it. For the dirt to ultimately settle in the garbage bag, the tank should be left in place for 15 to 20 seconds after emptying. Then, when the dust settles, remove the can and close the trash behind you.

For vacuum cleaners with bags: First, you should always try not to exceed the bag. Your vacuum cleaner will not work efficiently if the container is almost filled with dirt. When you begin to remove the bag, make sure to take the bag from the top so that there is no dust. After removing the container, you need to drop the bag in the trash can and close it.

After using these cleaning tips, your vacuum cleaner should smell and look beautiful. Remember these tips the next time you are tasked to clean your vacuum machine. Don't forget to regularly maintain this machine if you want to minimize vacuuming problems.

1 Comment

Comment

How To Clean A Kitchen Sink

kitchen sink

Your sink is to your kitchen as your bed is to your bedroom. It doesn't matter whether your entire kitchen is clean, a messy sink will drag the whole room down! But keeping that sinks clean and shiny is a tall order.

Most sinks end up being the depository for every unclean dish in the house, and it takes much less time to dirty a bowl than it does to clean one. Unless you've got pro-level skills, or the help of our professional maid cleaning company, keeping your sink clean can feel like an uphill battle.

Keep your sink empty

The real secret to a clean sink is never to cram it full of dirty dishes. Easier said than done, right?

Not really - all you have to do is start putting your dirty dishes directly into the washer, rather than sloughing them into the sink where old food particles are left to rot at room temperature.

How to clean your sink (and give it a perfect shine). Cleaning your sink is super easy. Pull any debris out of your sink traps, then scrub down the bottom and sides with a mildly-abrasive sponge and some dish detergent. You can even use vinegar and water.

Alternately, you can spray your sink down, then dust a coating of baking soda over the top. Leave it to sit and do its magic, then scrub it away with your sponge. Buff your cleaned sink with a dry cloth for a perfect shine.

Blast away brown rings

Have you noticed brown circles around your drain?

Our cleaning team members can help. Try making a paste with dish soap and baking soda, then apply it to the brown area. Let it sit, then scrub clean using a toothbrush you've dedicated to the kitchen space.

Freshen up your food traps. Sink food traps can get pretty gnarly. Our maid cleaning company recommends cleaning these at least once per month to ensure that your sink and dishes aren't contaminated by hidden gunge.

Take your food trap apart if possible, and soak the separate pieces in a solution of water, dish soap, and baking soda. Before you reassemble the trap, give it a quick scrub with your kitchen toothbrush.

Unclog and deodorize the drain

If your sink drains slowly or has started to smell, you may have some buildup that needs to be cleared away. Dump a cup of baking soda down your drain, then leave it there for about an hour.

As you approach the sixty-minute mark, boil about 3 cups of vinegar in a tea kettle. This not only preps your drain for a thorough clean but will scale your pot clean of any harsh water buildup! Once the vinegar is boiling, pour it down your drain, and watch the odor and blockage disappear.

Comment

1 Comment

Leather Couch Cleaning Tips

leather couch

Want to learn how to wash your leather couch so it seems as great as new? Leather never remains out of style for long. It stands the test of time, ages beautifully, and easy to live with. The same applies for cleaning your leather sofas as it is relatively easy compared to fabric upholstery.

How to Clean Leather Furniture

Materials:

  • Saddle soap

  • Rubbing alcohol

  • Cotton swab

  • Water

  • Leather cream

  • Soft cloth

1. Clean off surface dirt

Begin with removing cushions and throws and assessing the back and sides for any loose change, sweetie wrappers and so forth. Use the brush attachment from professional leather upholstery to prevent scratching it. Gently suck up all of the crumbs and dirt that have collected on the outside, employing a slow sweeping motion. Switch to the crevice tool to find anything in the borders that your fingers could not reach, in addition to cleansing the seams. Repeat the same with the cushions.

2. Check the label

If your upholstery has its tag or a decal attached to the bottom, check it before using any cleaning solutions. W means it is possible to just utilize a cleaner. P or S means it could only be washed using solvents (dry-clean just). SW or WS usually means you could utilize either a water-based solvent or bleach cleanser. A steam cleaner will probably be nice to use, also. At length, X means you cannot use any detergent or water on the outside -- make it professionally cleaned rather.

3. Prepare your cleaning materials

The best suggestion for cleaning a leather couch would be to wash it using saddle leather or soap dew (a combination of oil and soap generally accessible shoe repair stores and decent furniture shops) once per week using a soft fabric.

4. Cleaning your leather

Most couches will be finished leather and it is nice to use a slightly moist cloth with a small quantity of a soft soap to provide a quick wash. Nonetheless, be certain that the fabric is simply damp rather than wet differently a water marker will be abandoned.

5. How to clean a leather sofa – the natural way

White vinegar is an excellent natural stain remover for many kinds of upholstery. Begin with blotting the stain with an equal parts vinegar and water solution, then wash away the blot lightly employing a microfiber fabric (just use a fresh cloth or make certain it's thoroughly clean). Follow this up using a combination of mild detergent and tepid to warm water to eliminate any lingering vinegar odor. Generally, you need to always handle stains the moment they happen.

Additional Tips

  • For regular cleaning, it's possible to just wash the couch using a sterile cloth or dust off it using a feather duster. When it's used greatly then you might look at cleaning the couch using a vacuum cleaner. Additionally, turn and fluff the cushions on a regular basis to prevent wrinkles.

  • spills) on the couch instantly, or the fluid will permeate the dye and then leave stains. Thus, blot the liquid as soon as possible. Don't wipe it, however; it might spread the liquid and then stain the surrounding region also.

  • Clean any spills (even water spills) on the couch instantly, or the fluid will permeate the dye and then leave stains. Thus, blot the liquid as soon as possible. Don't wipe it, however; it might spread the liquid and then stain the surrounding region also.

1 Comment

Comment

Grout Cleaning Tips

Grout lines attract dirt as well as grime. And a dirty grout can change the appearance of your tile. However, keeping it clean can be tricky sometimes; this is because it is porous. This means that it can absorb grease, spills or grimes that come into contact with it. Knowing how to clean your grout will not only prolong your tile’s life, but it also helps in making it look great. Below is the grout cleaning tips you should know.

a clean floor
  1. To get rid of surface dirt as well as grime, you should wipe your grout using hot water. For this to be effective, you should then mix the water with vinegar and spray it on your grout. It should then be left for a few minutes before scrubbing using a soft brush. To achieve more scrubbing power, you can make use of electric toothbrush; avoid using metal brush because this kind of brush can damage your tile. You should then rinse it with hot water after scrubbing.

  2. You can still make use of commercially prepared grout cleaners or rather diluted bleach. Ensure that you use it properly, and this can be done by following the manufacturer’s instructions on floor grout cleaning. These caustic products should be used sparingly; this is because using the regularly can erode your grout.

  3. A mixture of water and baking powder can help you get rid of stubborn grout stains. This can help you get rid of these stains if you apply it on the stain then let it soak overnight. After waking up in the morning, you should scrub it with a nylon brush then rinse it with hot water.

  4. For porous tile like marble, the less acidic solution should be used; this is because vinegar can stain your tile. You can try this by mixing peroxide, and baking soda then scrub it with a soft brush. Learning how to clean your stained grout in stone tile can prevent you from damaging the floor.

  5. Use sandpaper to get rid of the stains in the grout. You can also make use of a pencil top eraser; it should be rubbed firth and back across the stained grout to get rid of the dirt. When you are done, it should be rinsed thoroughly with hot water.

  6. Since grout is porous and also prone to collecting grime, you should, therefore, begin your grout cleaning mission with prevention. For recently installed new grouts, you can make use of grout sealer for ten to fifteen days; this will make it look its best.

  7. Always remember to rinse your tiles with water after you are done mobbing. This also applies to spills, after wiping the spills; you should always use a damp rag to wipe the area again, just to ensure there is nothing left to soak on your grout.

Once you are done with the cleaning, the grout should be left to air dry for 24 hours then placed on a grout sealer which is silicone based; this will help in preventing future stains and dirt.

Comment

Comment

Spring Cleaning Tips for 2019

It is high time you start thinking about spring cleaning for your home. It is very important that you do this type of cleaning, especially if you are an allergic person or you have a family member who is allergic. Cleaning your home will do you good; it will be good for your health, improve the appearance of your home and also make your home to be more welcoming for the visitors. Below is a list of some of the 2019 spring cleaning tips which you can put into practice and make your home look pleasant.

Create a plan

Make a list of the areas which you normally skip during your routine cleaning. By doing this, you will be in a position to focus on the task at hand.

De-clutter

By doing this, you will be able to be organized during the cleaning process, and more than that, you will also be in a position to know when work is done or not.

Work from the top to bottom

You should always ensure that you begin working from the ceiling all the way down. By doing this, you will be able to avoid re-dusting or re-cleaning cleaning; this is because working in this direction forces debris downward. Before you begin vacuuming the dirt from the floor, you should first dust the furniture and any other item in your home.

Find the appropriate vacuum

Once your home is ready for cleaning, find the right vacuum, and this can HEPA vacuum for example. This type of vacuum is very good for spring cleaning; it can even catch the particles that cannot be seen. It can help in removing allergens as well as other impurities from your air.

Think green

Do not use harsh chemicals and ingredients for your cleaning. One of the best cleaning product is the steam cleaner. You can use it to clean the microwave, hard floors, kitchen appliances, tiles, bathrooms as well as the outdoor areas. Steam cleaners are normally 100% natural; they are chemical free because they only use water vapor for cleaning.

Do not forget about the windows and walls as well. You can simply use a damp towel to wipe through the walls; this should be done from the top going downwards. The same should be done for the windows; however, to get great results from window cleaning, you can opt to use the squeegee.

Your kitchen cabinets should be cleaned as well as the refrigerator. Go to your bathroom and change the shower curtains and then go to your drawer and get rid of any expired medicine or cosmetics.

Home cleaning can seem to be very tiresome and difficult before you start, but once you start, you will find it even more enjoyable. You only need to have proper planning and find an ideal time to do the cleaning; you do not want to be interrupted by work or anything while enjoying cleaning your home. Clean your home and live a healthy life, a life free from stress and pressure.

Comment

Comment

St Patricks's Day Cleanup

St. Patrick’s Day Cookies on a plate

St. Patricks’s day marks the major clean up in various cities and towns. And when you think about this day, the first things that will come to your mind are people dressed in green, shamrock, parades and maybe packed pubs. If you can wake up very early in the morning, that is the morning after the night; you will notice that the streets are not normally a pretty sight. People drop glass bottles, food wrappers, vomit, cans, and even urine.

But what about the people whose job is to make sure that they do the clean up after St Patrick’s day, they have to ensure the streets are clean and make everything go back to normal. For street cleaners, this is the busiest day of the year.

This is the busiest day than any other day of the year. You will find that this day has over one hundred and fifty cleaning shifts compared to the other days of the year. Therefore, the street cleaners do not have time for their families during this time.

The night before the parade, there is a night crew which is normally assigned to begin the cleanup. And many are the times when more workers are shifted from other areas to the city; this is because this day, extra staff is normally needed due to the increased workload.

Those working on night shift might begin working at 10 pm and finish at 6 am which is tiresome. And the morning after, there is a wash crew which is supposed to ensure that there is nothing on the road that should not be stepped on. If there are any kinds of an offensive poster, they are also responsible for taking it off.

Some of the messiest St Patricks’ days are normally when the sun shines. This is because people normally tend to make the day out of good weather like sunny weather. This might require the cleaners to clean at least three times that day. The most surprising thing is that even after cleaning it three times, there will still be some rubbish and bottles around the streets at night. And that is why there is a night crew for that; on top of that, there is also a 4 am crew which is supposed to deal with early morning rubbish.

Councils doing cleanup after St. Patrick's Day have reported of cleaning up to 20 tons of rubbish compared to the normal weekends which they only clean up to 5 tons of rubbish.

The most important thing is health and safety, that why the council normally ensures that the cleaners are placed in crews, this is to avoid the instances of someone working alone. And by doing this, they will be in a position to work as they enjoy themselves; hence they will be very happy as they work. They also avoid walking into a group that they think might cause trouble; they, therefore, opt to clean that area later when the group is already gone.

Comment

Comment

Which Cleaning Products Can Be Used to Kill Molds?

Mold is not only a common household problem but also a health hazard because it can affect your health as well as that of your loved ones. Some of the signs that you have been affected by mold include sore throat, burning eyes, rash, coughing and breathing problems especially if you are allergic. It is important to understand that poor ventilation and the presence of moisture are the two factors that facilitate the growth of mold. However, certain building materials might have needed ingredients e.g. cellulose substrate to attract spore growth. You are required to look out for the signs to ascertain that there is mold growth in your house. If you see some of the signs related to mold growth, you can clean the mold by hiring a professional company or do it yourself. Here are some of the cleaning products that can be used to kill molds:

I. Vinegar

Vinegar is a mild acid that’s known to kill about 82% species of molds. Therefore, it is an effective mold killer and it has been used by most homeowners over the years to control molds in their homes. To kill molds, you need to dilute the vinegar with some water (although you can spray it directly from the bottle) and then spray the affected area. Leave the spot for a few hours and then scrub it using a brush. If you are looking to prevent mold growth, you can spray vinegar on the surfaces where mold is growing and then leave it to dry. Then, you can spray again after some few days to make sure that you’ve killed all the molds.

II. Bleach

The main active ingredient of bleach is sodium hypochlorite and it is effective in mold removal. You just need to spray or wash the area where mold is growing with bleach and you will kill all the molds. However, bleach is effective on non-porous surfaces only e.g. on glass, countertops, tiles, and bathtubs. When used on a porous material, the water component of bleach is absorbed while the active ingredient (sodium hypochlorite) is left on the surface. Therefore, you can only kill molds that are on the surface and after a short period of time, the molds will regenerate. For this reason, you should use bleach on non-porous surfaces only for it to be effective.

III. Borax

Borax is a natural mold inhibitor and it has been used for many years to kill molds. In fact, borax can be used as a fungicide, insecticide or herbicide. If you are looking to kill molds, you just need to mix it with some water to make it easy for you to scrub the mold-affected areas. After you are done scrubbing with a brush, you don’t need to rinse borax because it can be used to prevent further growth of molds.Here are some of the advantages of using borax:

  • It is a natural cleaning product although it’s toxic if you swallow it

  • Borax does not emit dangerous fumes or toxic gases that could affect your health

  • Borax has low toxicity and it is an effective mold killer

IV. Hydrogen Peroxide

Hydrogen Peroxide is antibacterial, antifungal and antiviral and hence it can be used to kill molds. You just need to buy the cleaning solution from a drug store and it is ready for use. However, you need to spot test the material you are going to clean to ensure that the cleaning solution won’t fade the colors. Here are some benefits of using Hydrogen Peroxide to kill molds:• The solution is effective on a wide range of materials including floors, bathroom fixtures, walls, tiles, clothes etc.• Hydrogen Peroxide does not produce toxic fumes nor leaves a toxic residue after cleaning.

It is evident that there are effective cleaning solutions that can be used to kill mods in a short period of time. If you are going to do it yourself, you need to research well to do it right and to take the necessary precautions. For instance, if you are going to use bleach, you may have to dilute the cleaning solution and/or use nose muffs and gloves to avoid exposing yourself to harmful fumes or toxic substances when cleaning molds.

Comment